Up and Running on the 3290 or 3780

New Pronto 3290 or 3780?
If you are receiving a new Pronto 3290 or 3780, please first see the forum post at: http://forums.openflowhub.org/showthread.php?85-How-to-Install-Indigo-on-the-new-Pica8-Software-Images-for-3290-and-3780
Goals
After working through this document, you should have a Pronto 3290 running OpenFlow and connected to a controller.
If you run into severe problems and are not able to boot from the compact flash card, please see this page: Reflash the 3290 from the Backup Image.
If you have even worse problems and are not able to load the flash image (with 'run flash_bootcmd') then you may be able to reload the flash files to the switch. See Reflashing a Pronto Switch for more information.
The instructions in this document should apply to the Pronto 3780 platform as well. In general, just replace 3290 with 3780 and LB9A with LB8 in the instructions below.
Prerequisites
You need the following to complete the setup.
- A Pronto 3290 Ethernet switch.
- A computer running a TFTP server (there are some notes on this below).
- A computer (could be the same one as above) that can telnet and has a web browser. Preferably it can also "ping".
- A switch or network to connect the Pronto switch, the controller, the TFTP server and the telnet client.
- The Indigo firmware you want to load placed in the TFTP server directory.
- An IP address for addressing the switch.
- The IP address of the controller to which you want to connect.
- The IP address of a gateway router (if the controller is not on the same L2 domain).
- You will either need to connect via a serial port or be able to configure your computer's ethernet port with an address on the 192.168.1.x address.
The directions below allow you to set up the 3290 without the need to connect a serial port. However, this requires that you can configure the IP address of your computer and TFTP server to be on the 192.168.1.x subnet. See 'Physical Connection' below.
If you need information on using the serial port, see this web page: Serial Ports on Quanta and Pronto. If you use the serial port, all commands indicated for the switch can be executed in the serial console. In addition, you can configure the Ethernet port on the switch to be any address you like.
Plan of Action
After unpacking, we'll connect the switch and computer(s) and check the connectivity. We'll use TFTP to transfer an image to the compact flash card in the system.
Once the switch can boot the new OpenFlow image we can configure the parameters that allow the switch to operate in OpenFlow mode.
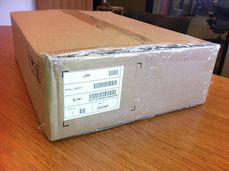
Unpacking
|
|
|
Arrives in a rather non-descript box |
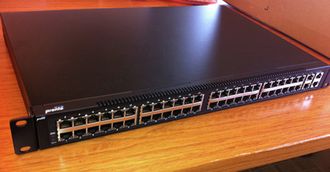
Unpacked, front panel |
Please don't eat the desiccant. |

Physical Connection
If you're not connected via the serial port (see Serial Ports on Quanta and Pronto for more information on connecting via the serial port) you need to be able to configure the Ethernet interface on your computer to use the address 192.168.1.10 (or any 192.168.1.x address). This is because the 3290 configures its Ethernet port to 192.168.1.1 by default.
|
Connect the computer to the Ethernet port on the Pronto |
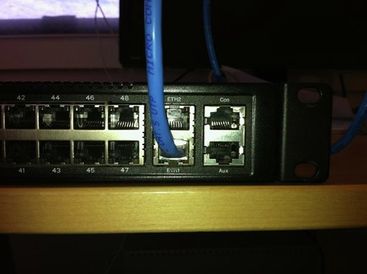
Connect the switch's Ethernet port to the network that contains the TFTP server and the computer with telnet/ssh.
First Boot
It is important that you complete all the steps of this section before rebooting. Otherwise you will need to start over with the serial port connected.
Connect with Telnet
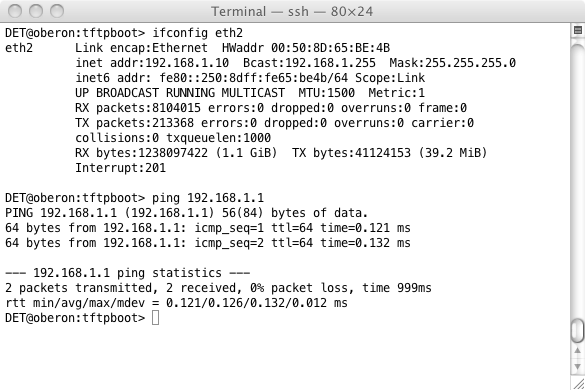
If you are not using the serial port, you need to be patient while the switch boots. It may take a couple of minutes before the switch up. You can test connectivity with the switch with the "ping" command. The following screen shows that we've configured the TFTP server's eth2 address as 192.168.1.10 and then did a ping to 192.168.1.1, the default address of the 3290. You may need to configure a different Ethernet port on your computer.
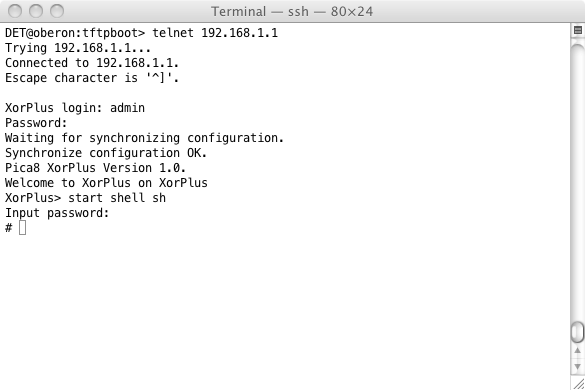
You can now telnet to the switch using the username "admin" and the password "pica8". This will take you to the XorPlus prompt. Enter the command 'start shell sh' to reach a Linux shell. You will need to use the password "pica8" again.
Load Indigo Images
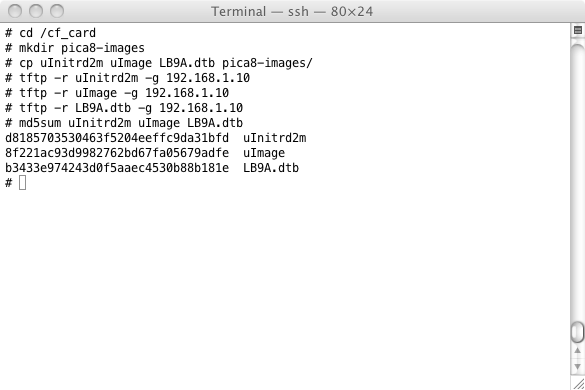
Now, change to the /cf_card directory, save the current files to backup and then tftp the new images on to the system. Verify the transfers by checking the md5sums. Note that the numbers shown here may be different; check against the md5sums distributed with the image you are using. Here are the commands that you should be able to copy and paste; below that is a screen shot. You may need to adjust the IP address for the TFTP server if yours is different.
Important: The filenames uImage, uInitrd2m and LB9A.dtb will likely be different when the files taken from a release. For example, the recent file names are:
- uImage-2011.10.03-pronto-3290 for uImage
- uInitrd2m-2011.10.03-pronto-3290 for uInitrd2m
- device-tree.dtb-pronto-3290 for LB9A.dtb; for the 3780, the target file is LB8.dtb
You can either rename the files when you copy them to the TFTP directory, or rename them after you have copied them to the target system. It is important that the files have the names uImage, uInitrd2m and LB9A.dtb when the system is rebooted.
If you are upgrading from a previous release of Indigo, you only need to install the uInitrd2m file, not uImage or LB9A.dtb.
cd /cf_card
mkdir pica8-images
cp uInitrd2m uImage LB9A.dtb pica8-images/
tftp -r uInitrd2m -g 192.168.1.10
tftp -r uImage -g 192.168.1.10
tftp -r LB9A.dtb -g 192.168.1.10
md5sum uInitrd2m uImage LB9A.dtb
Set up switch IP address
You now need to add the file that tells the Indigo software the IP address of the switch when it boots. Follow these directions very carefully.
Change to /cf_card and make the new directory 'local'. See the note below if this already exists.
cd /cf_card
mkdir local
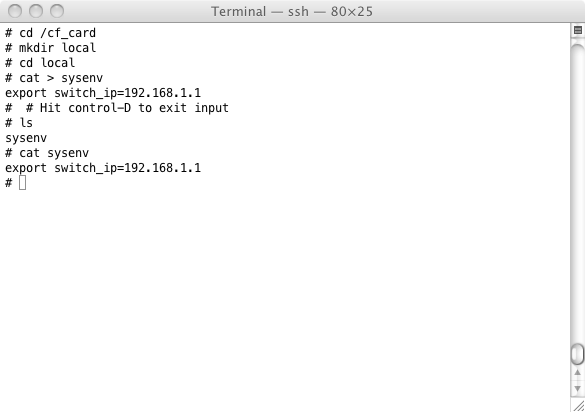
You will now create the file 'sysenv' defining the variable switch_ip. When you have finished typing in the 'export' lines, type Control-D to exit the 'cat' command.
Note that we are using the 192.168.1.1 address for the switch for now. If you want to set it to the final address of the switch you can, but you'll need to connect to it at that IP address (and on that subnet as we are not setting a gateway yet).
cd /cf_card/local
cat > sysenv
export switch_ip=192.168.1.1
(and type in Control-D).
You are now ready to reboot the switch by typing 'reboot' at the Linux # prompt. This will terminate your telnet session to the switch and you'll have to wait for the system to reboot.
Reboot and Configure
You should now be able to contact the switch via a web browser. Start the web browser and enter in the URL:
http://192.168.1.1
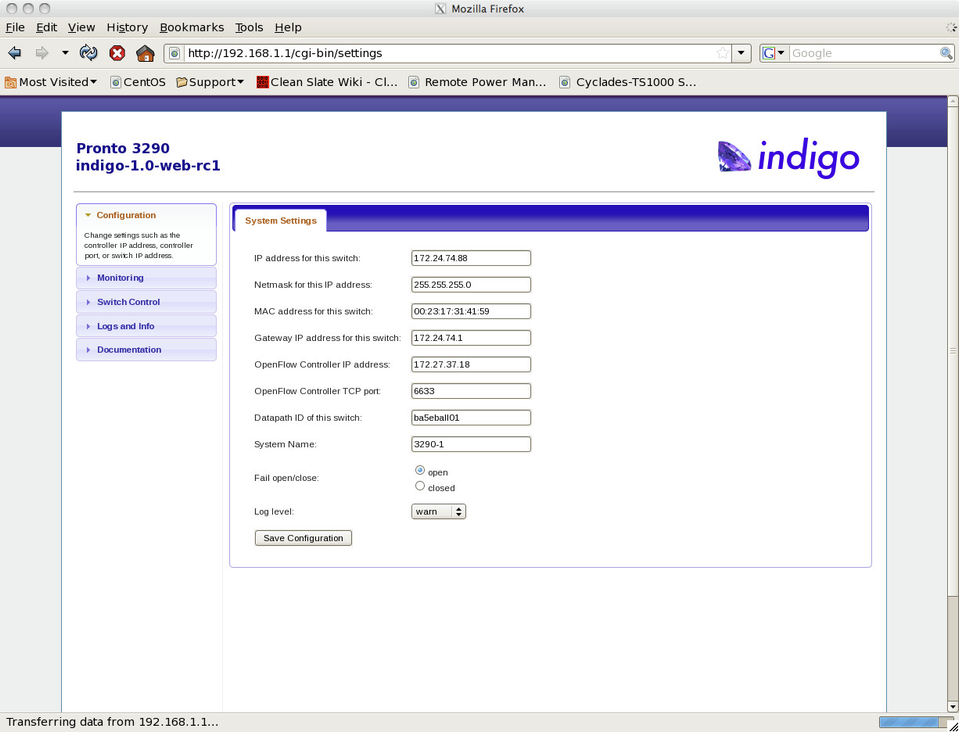
If all goes well, it should come up with a screen like the following.
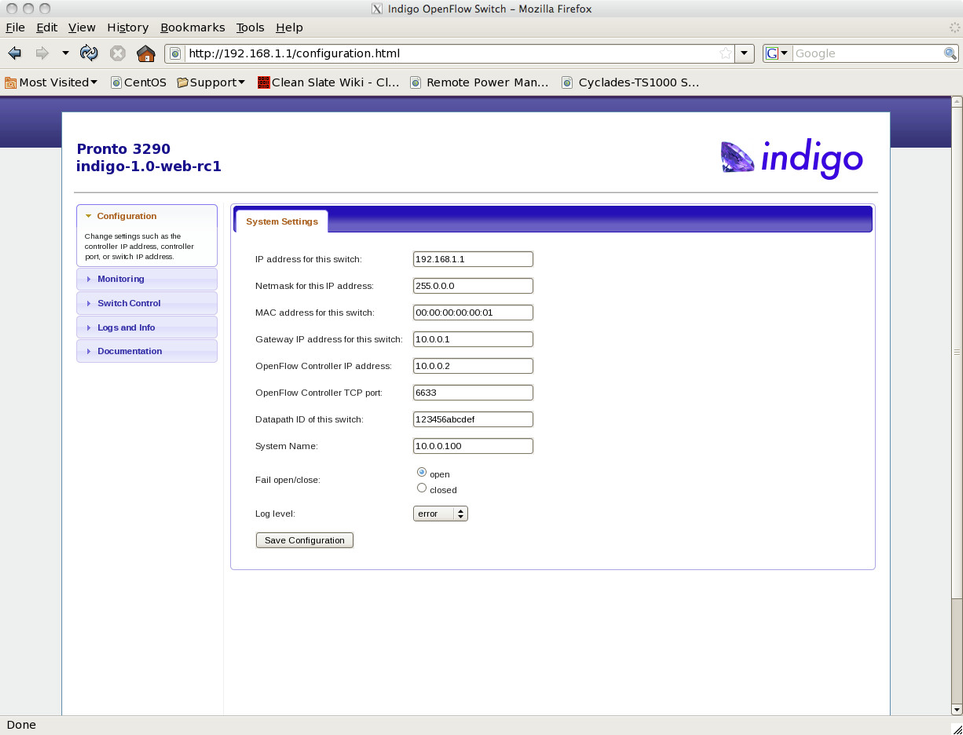
Set up the configuration as you like. Example values are given here. You need to set the IP address of the controller. If the switch and controller are not on the same subnet, you need to set the IP address of the gateway as well.
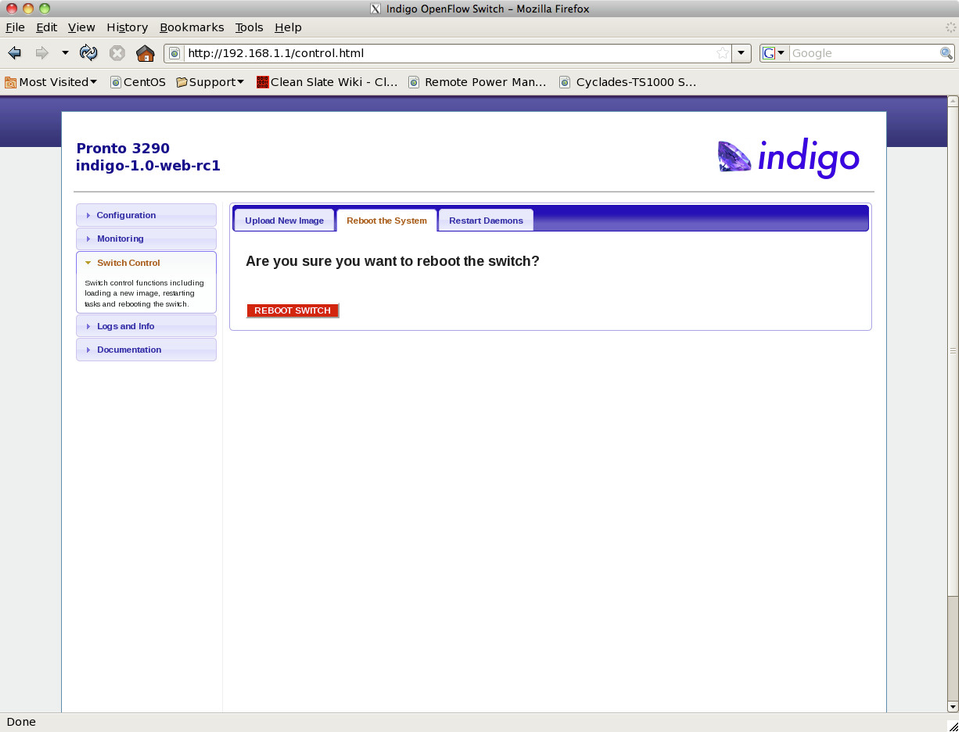
Once you have set the configuration the way you want, you will need to reboot the switch. (If you do not change the IP address of the switch, you can just restart the OpenFlow daemons). Select the 'Switch Control' menu on the the left and the 'Reboot the System' tab on the top.
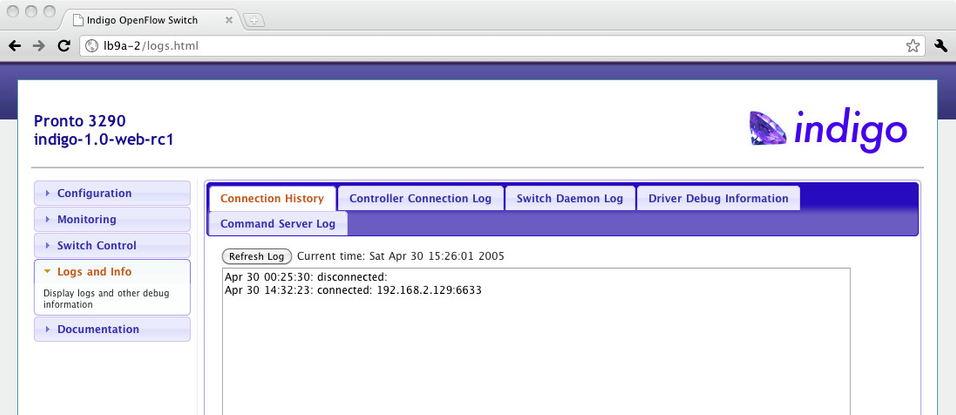
At this point, you may need to move your network connections around if the controller is on a different network than you were connected to for the initial bringup. After the system reboots, you can reconnect to the switch with the web browser at the new IP address. If the controller is up and running, you can verify that the switch is connected either at the controller (see your controller documentation) or at the switch by viewing the 'Logs and Info' page, selected on the left, and 'Controller Connection History' tab.
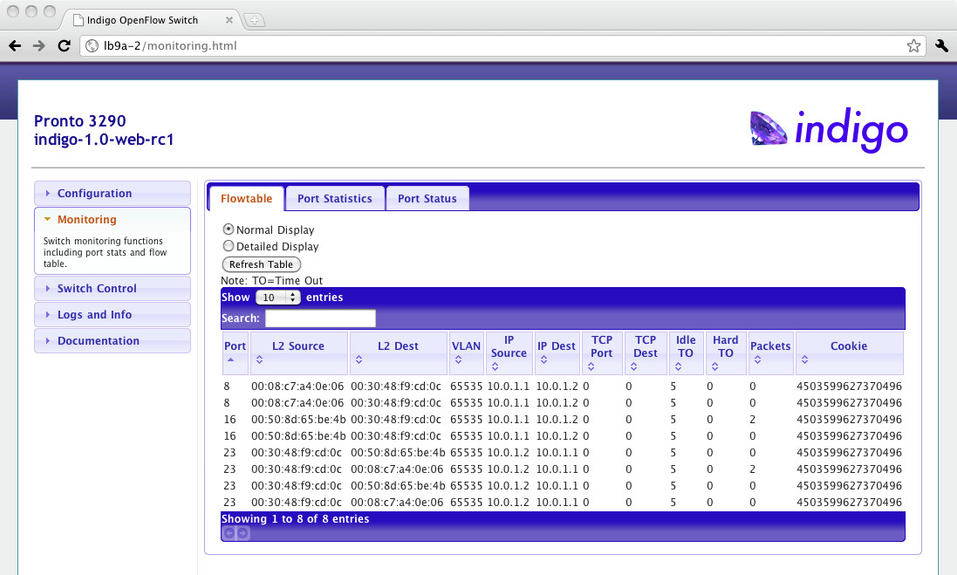
If you have hosts connected to front panel ports of the 3290, try pinging between them and then checking the Flow Table on the 'Monitoring' page.
Appendix: Setting Up TFTP
Setting up TFTP can be non-trivial. Here is an example of how to do it on a Linux box running Ubuntu. For other platforms, try a web search for your OS and "tftp server set up"
- Use apt-get or synaptic to install the tftpd-hpa package
- Ensure xinetd is installed
- Place the following config file into /etc/xinetd.d, name it tftp
      service tftp
     {
         protocol    = udp
         port        = 69
         socket_type    = dgram
         bind        = 192.168.2.2
         wait        = yes
         user        = root
         server        = /usr/sbin/in.tftpd
         server_args    = -c -v -v -s /tftpboot
         disable        = no
     }
The -v may not be supported in your tftpd version. -c allows the creation of files.
Restart xinet.d (/etc/init.d/xinetd restart).