Add Group
![]()
Adding Groups to a Switch
Without groups, switches connected to FlowScale will only drop incoming traffic.
There are two main components to adding group
- The subnet that would include the incoming traffic
- The ports on the switch that will direct the outgoing traffic
As mentioned, all incoming traffic dropped by default. However, if we add a particular subnet, incoming traffic with an IP address belonging to that subnet will be directed to the designated output ports. E.g. When adding a subnet (e.g. 192.168.1.0/24) you may select specific ports for the outgoing traffic. E.g. incoming traffic containing an IP address from 192.168.1.0/24 would be directed to ports 5,6,7,8.
In order to add a Group:
- Got to http://<url>/flowscale_ui/index.cgi?action=group
- Click Add Group
- Insert a name for the group (e.g. LAN traffic)
- Select the switch that will deal with the incoming traffic and the outgoing traffic. Make sure they are the same value. (Sounds counterintuitive, but this was due to a design decision)
- In the input ports sections just select any port (this is necessary to avoid a null entry) it doesn't matter what you enter
- In the output port select the ports you'd like the outgoing traffic to head to. For example if you want the traffic to be directed to ports 5,6,7,8. Select all of those ports
- Select the group type for the IP address
- In the group value, enter the IP address and the subnet (e.g. 192.168.1.0/24)
- Enter the maximum flows allowed on the switch for this rule. E.g. if you want 20 flows for this subnet choose enter 20.
- Select the priority of the flows. Choose 100
Click Add group (see below) 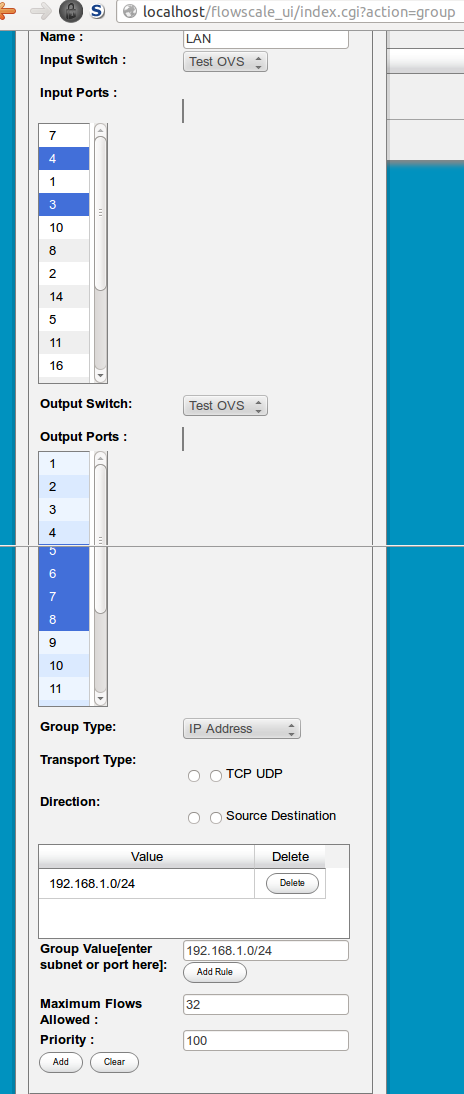
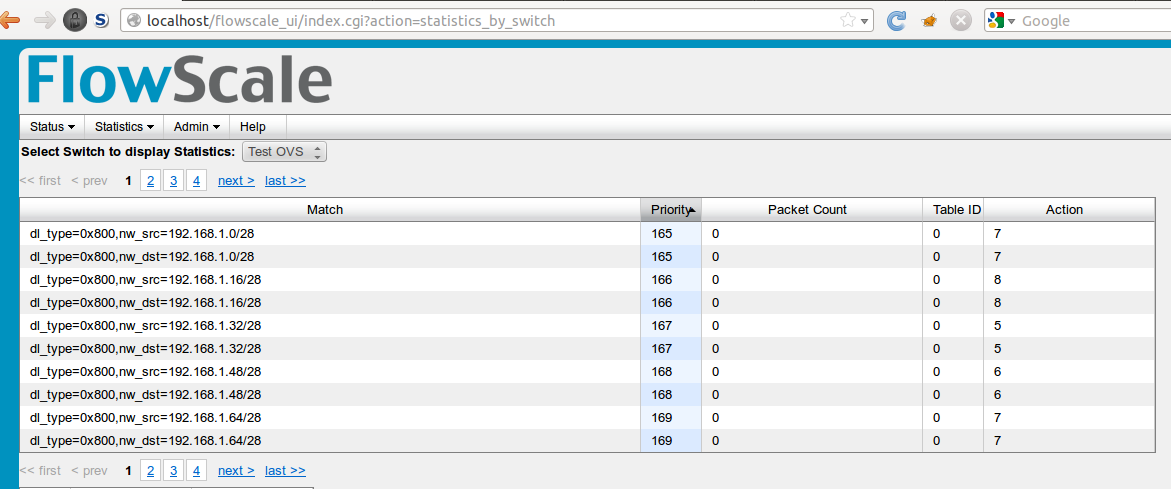
On the menu go to Statistics->By switch. Select the switch. You should see the new added flows.